
Installation and Configuration of an iSCSI Target on Windows Server 2019
Internet Small Computer Systems Interface (iSCSI) is a storage networking resource that employs Internet Protocol connectivity to link up data storage facilities.
It provides block-level access to storage locations via TCP/IP network-carried SCSI commands. The iSCSI target is the network location (storage) and it appears as a local hard drive to the iSCSI initiator.
Basically, an iSCSI initiator is a client that connects to an iSCSI target.
When enabled and configured, an iSCSI Target Server turns a Windows Server OS computer into a network storage device.
Network-accessible storage is important in testing applications before installing them on a Storage Area Network (SAN).
How to install iSCSI target on Windows Server 2019
To perform this installation, you’ll need to have unrestricted administrative privileges to a computer running Windows 2019 server OS.
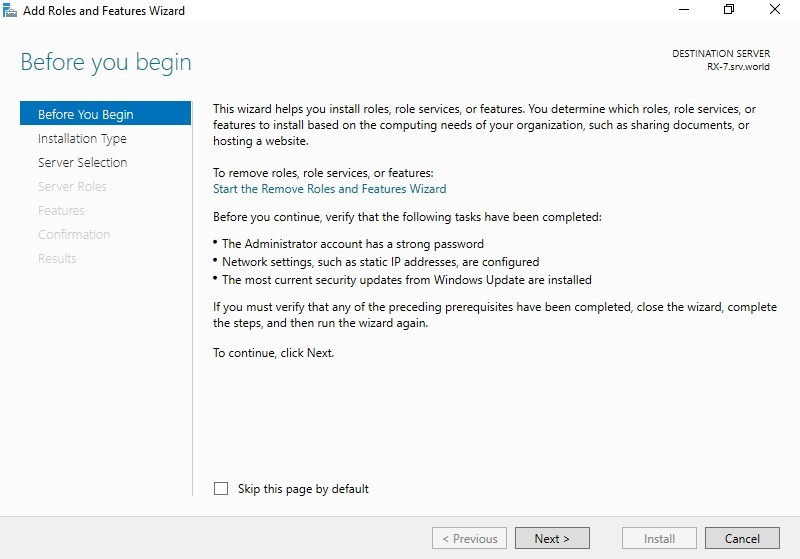
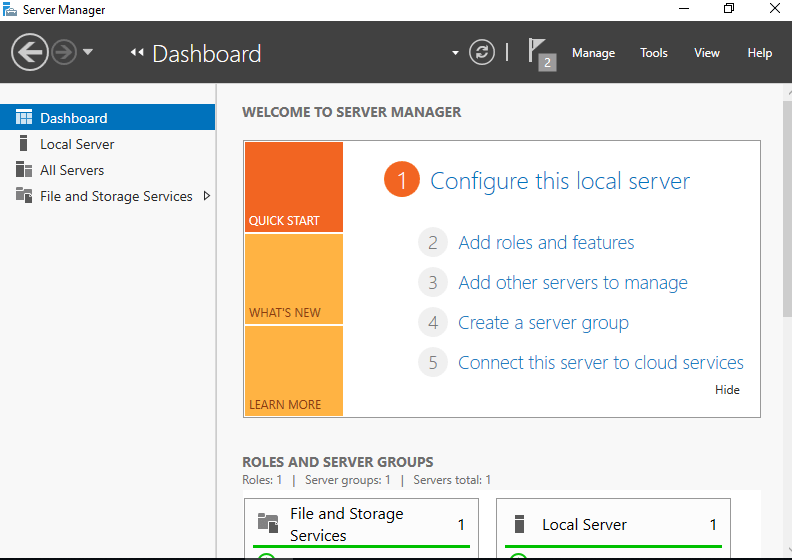
Step 1: Run the Server Manager on your Windows 2019 server OS

Step 2: Select the ‘Add Roles and Features’ tab
You can choose to skip the ‘Before you begin’ step by checking the small square selection box at the bottom of the page.
Click ‘Next’ to continue the installation wizard.
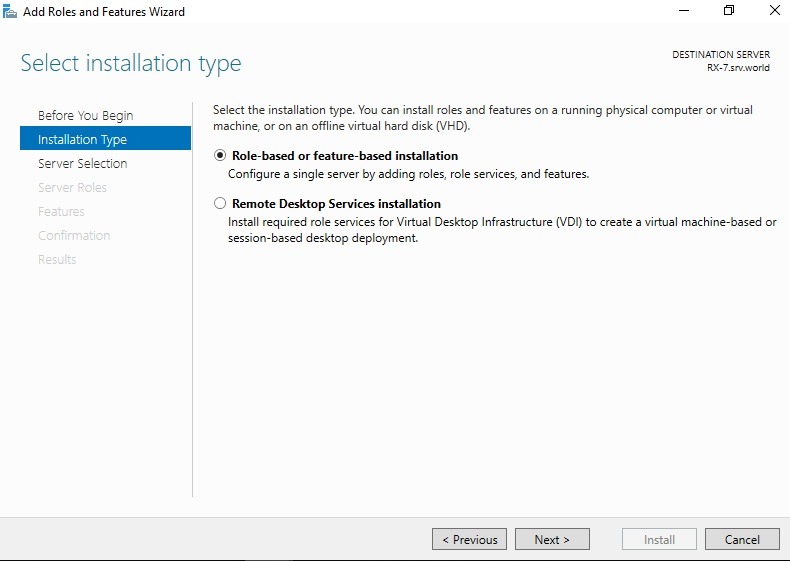
Step 3: Define the type of iSCSI target installation you want
Here, check the ‘Role-based or Feature-based installation’ button and click ‘Next’ to continue.
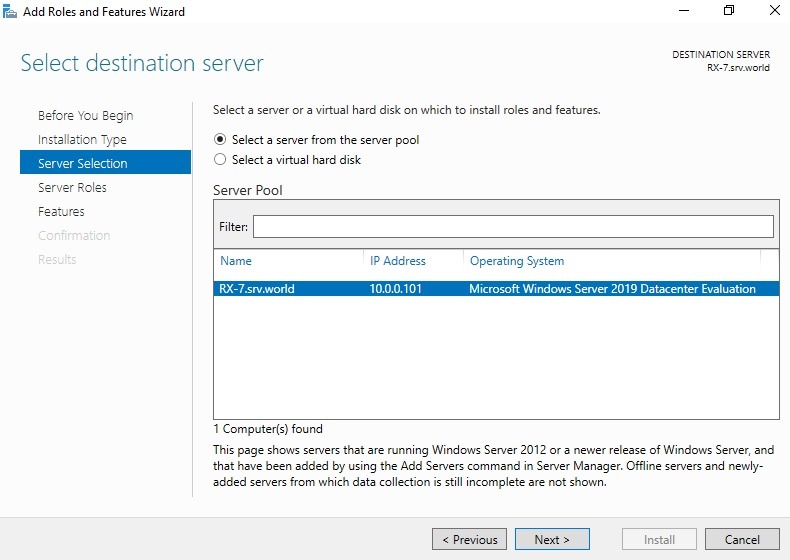
Step 4: Select a Host for your iSCSI target’s roles and services
This may be your local server or a virtual hard drive on your server. In our case, we’ll use the local server.
Hit ‘Next’ to continue.
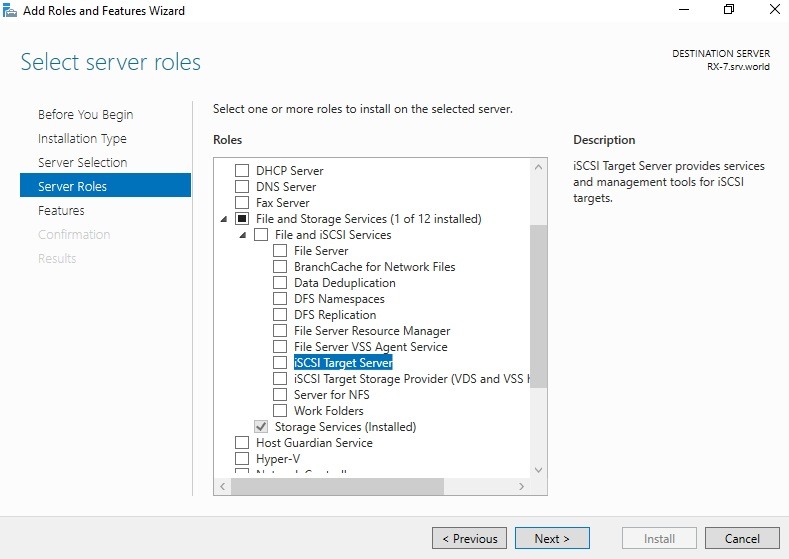
Step 5: Select the iSCSI Server Roles
In this step, we’ll define a list of server roles to install for the iSCSI target.
Click on the “Files and Storage Services” tab to expand it.
Select “File and iSCSI Services” then check the box against “iSCSI Target Server”.
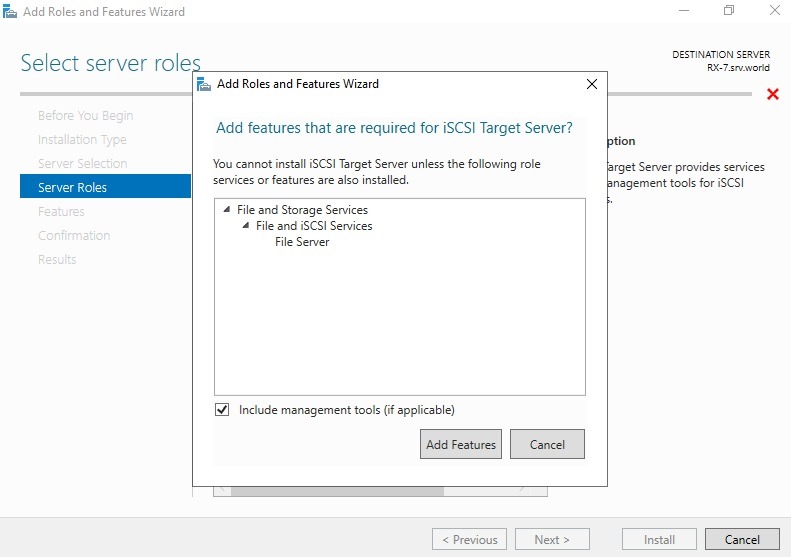
Step 6: Add features for your iSCSI target
When you select “iSCSI Target Server” in the previous step, a pop-up window titled “Add features that are required for iSCSI Target Server?” will open.
Here, click on the “Add Features” tab then hit “Next”.
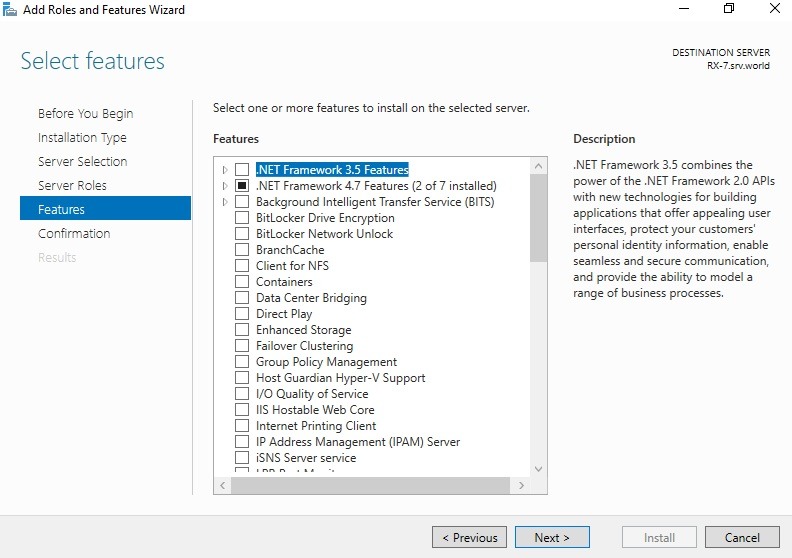
Step 7: Select features
Check all additional features required to install the iSCSI target server and click ‘Next’.
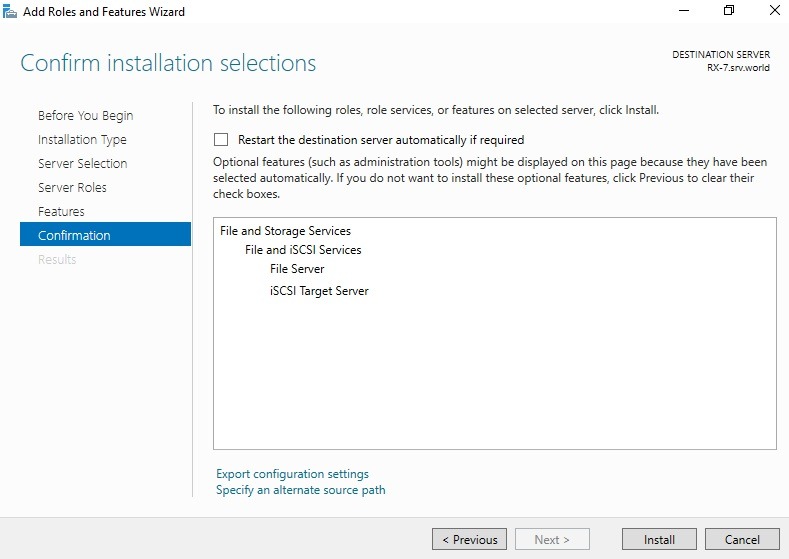
Step 8: Confirm your installation selections
Confirm that iSCSI Target Server and the other selections you have made in the steps above are listed, then select “Install”.
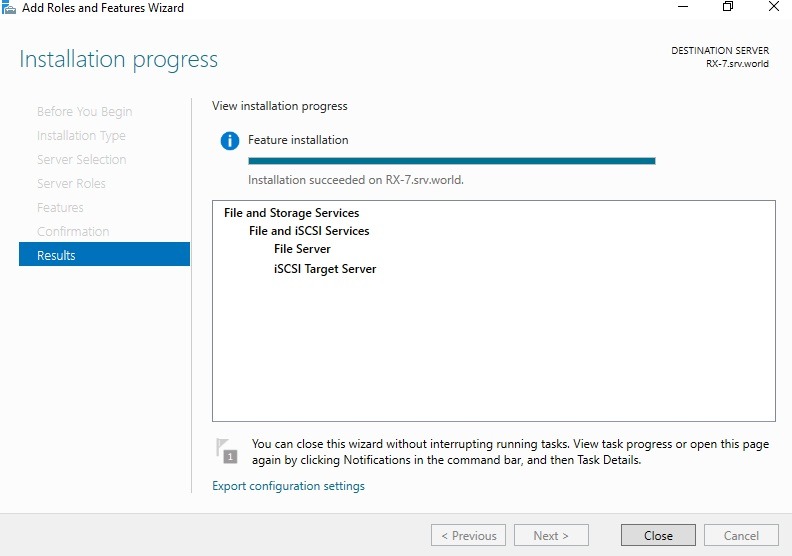
Step 9: Complete the iSCSI target server installation
When the installation of selected roles, features, and services is complete, click “Close” to complete your installation of iSCSI Target Server.
How to configure iSCSI target on Windows Server 2019
To configure our iSCSI target on Windows Server 2019, we first need to create a folder that initiators will connect to.
You may create a folder or directory in any of your preferred disk partitions.
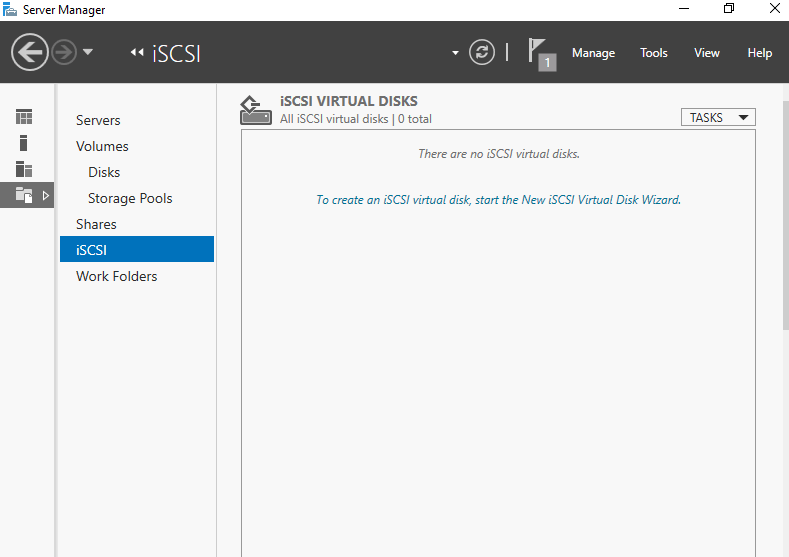
Step 1: Run your Windows 2019 server manager and select “File and Storage Services”
Step 2: Choose “iSCSI” from the expanded menu on the left of the pane
Click on the “To create an iSCSI virtual disk, start the New iSCSI Virtual Disk Wizard” link on the right of the window and a configuration wizard will pop up.
Step 3: Specify the server and disk volume to set the iSCSI disk
In our case, we selected “Type a custom path” then browsed to the folder we created before starting the iSCSI target configuration process.
You can select the folder and hit ‘Next’.

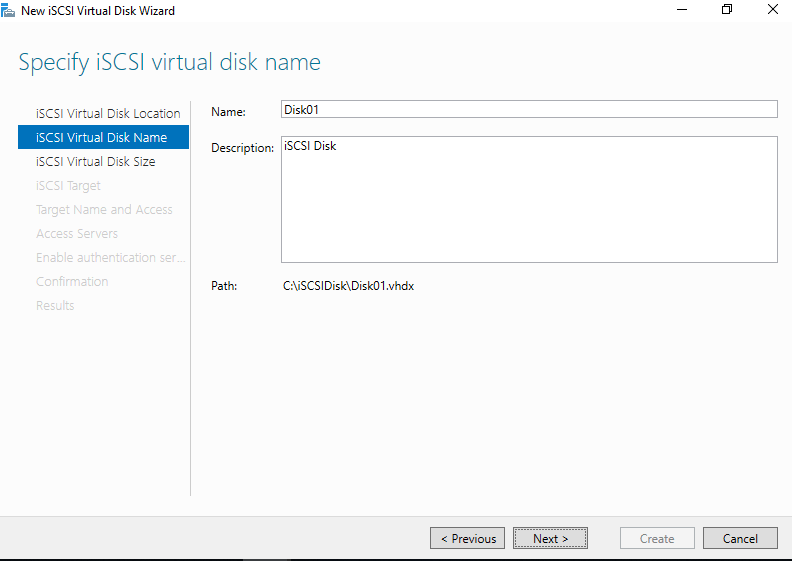
Step 4: Specify your virtual disc
Name and describe your virtual disk then click ‘Next’ to proceed.
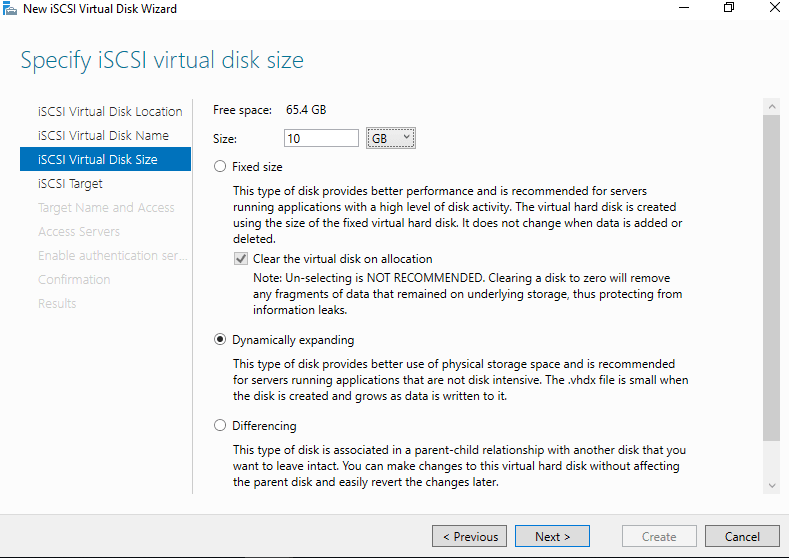
Step 5: Set the iSCSI virtual disk size
Besides determining the size of the virtual disk, choose the most suitable disc mode depending on your iSCSI targets’ needs.
Check one option from the three options and click ‘Next’ to continue.
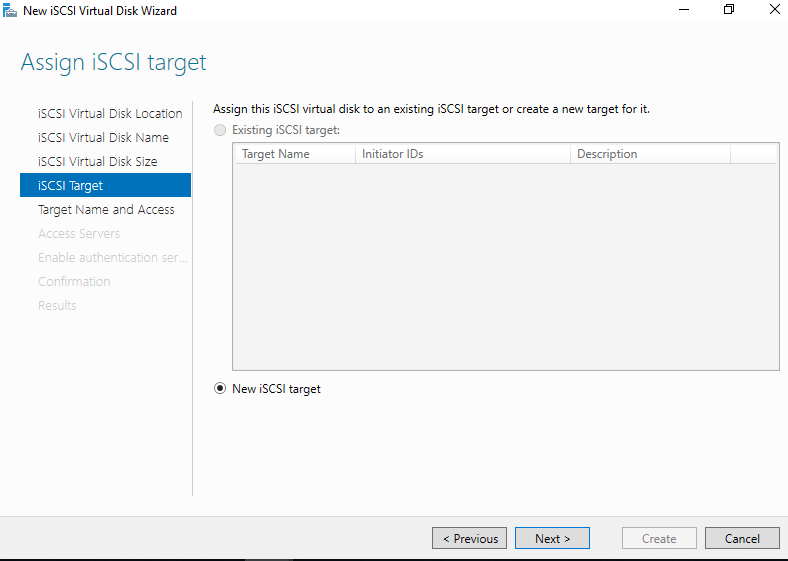
Step 6: Choose the iSCSI target for your virtual disc
Specify the iSCSI target you want to assign your virtual disc.
Since we’re configuring a new iSCSI target, proceed as shown below:
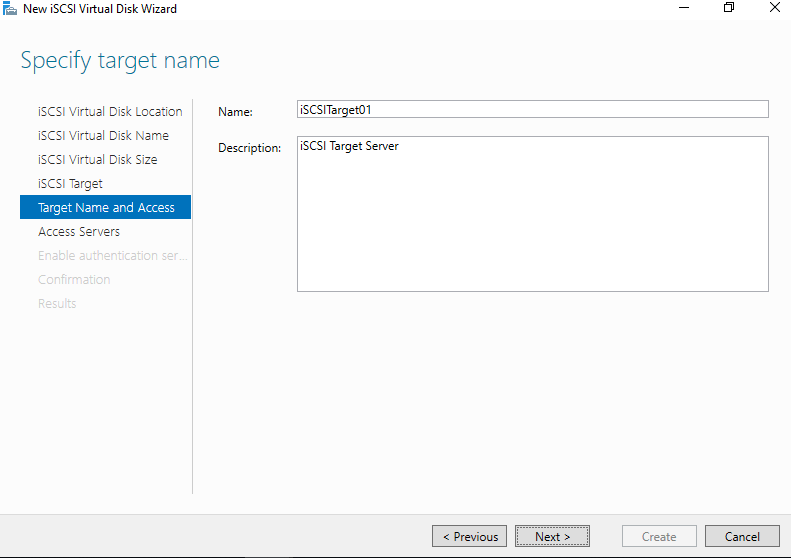
Stage 7: Specify the iSCSI target name
Simply name and describe the iSCSI target and proceed with the configuration.
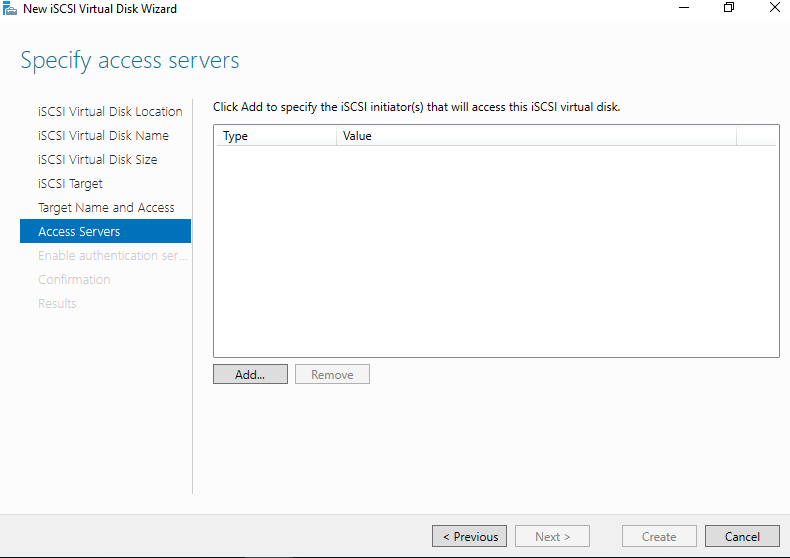
Step 8: Specify access servers for this iSCSI target
To control access and maximize security, you should allow iSCSI target access to only known initiators.
Then, select the ‘Add’ tab to continue.
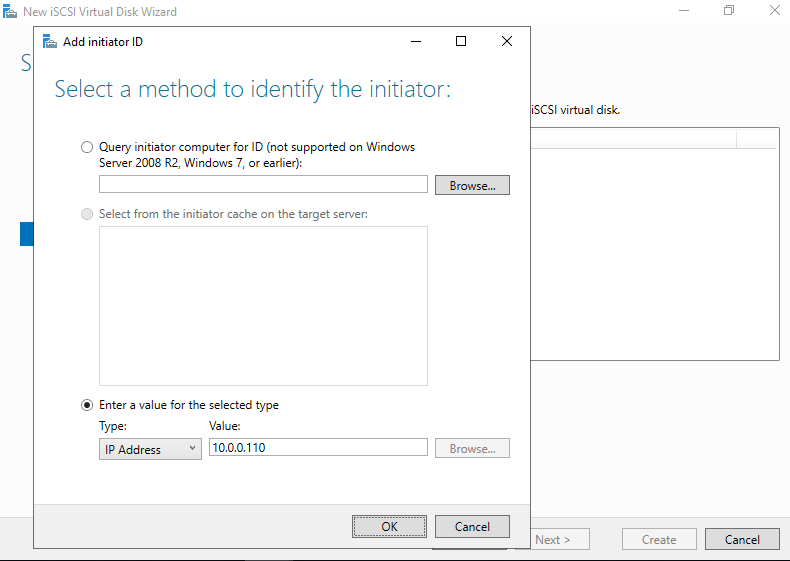
Step 9: Choose a verification method for the initiators
Under ‘Type’, choose ‘IP Address’ from the drop-down menu and key in the initiator’s IP address under the ‘Value’ field, then hit ‘OK’.
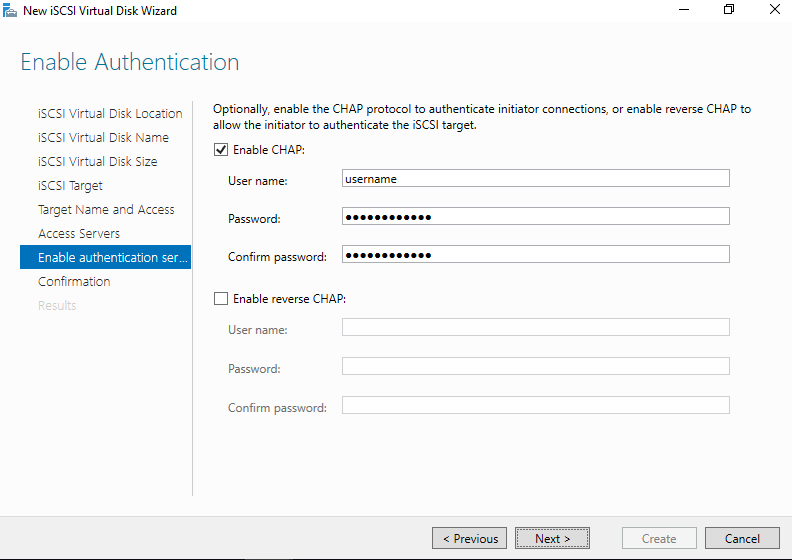
Step 10: Configure an authentication method between the initiator and your iSCSI target
Choose the ‘CHAP’ option, then set a username and password to control the initiator’s connection to the target.
Click ‘Next’ to proceed.
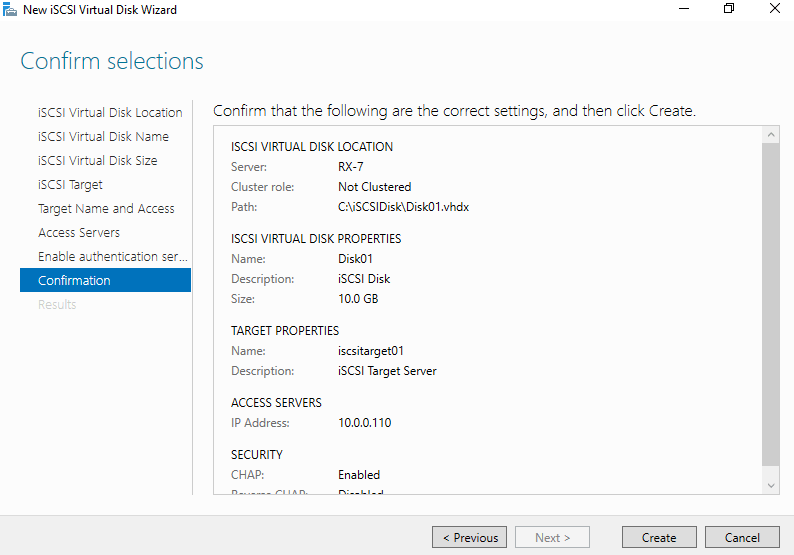
Step 11: Confirm selections to finish the iSCSI target configuration
Check that all selections are as you desire, then click ‘Create’.
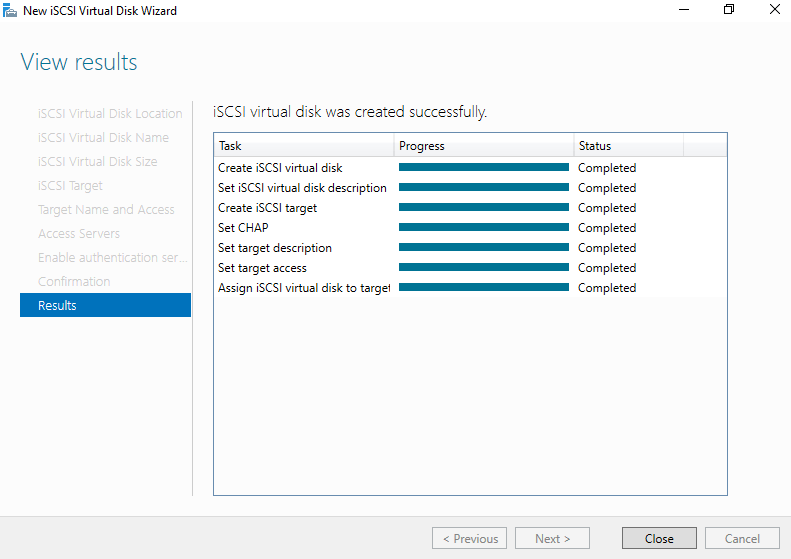
Step 12: Complete the iSCSI target configuration
When all progress bars indicate ‘completed’, click ‘Close’ to wind up the configuration and exit the wizard.
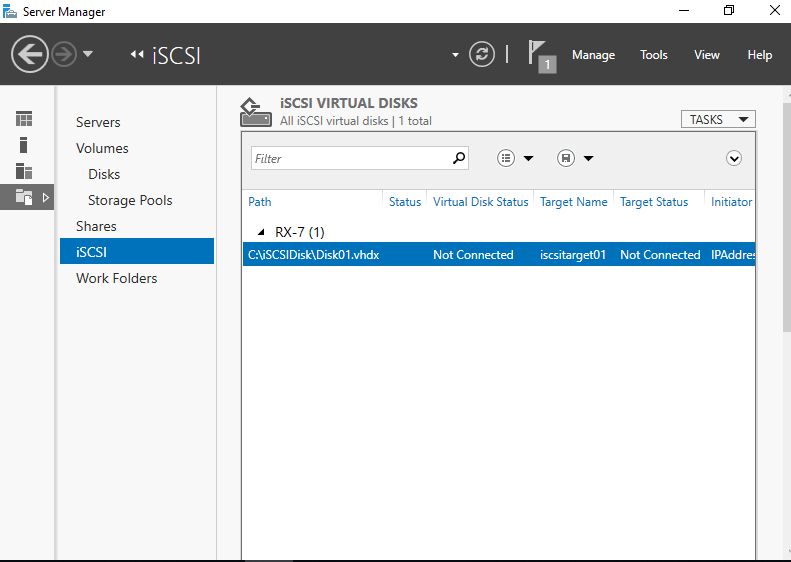
Step 13: View the new virtual disc in the Server Manager as shown below
You have successfully installed an iSCSI target Server and created a target virtual disk on Windows Server 2019.
You may now proceed to configure an iSCSI initiator on your Windows 2019 Server.
Final Takeaway
The use of iSCSI Target on Windows 2019 Server is a welcome revolution to Storage Area Networks (SAN).
It not only amplifies the efficiency of Network-based and diskless boot performance but also accelerates the process. You can even leverage software loaders or boot-capable network adapters to deploy and use numerous diskless servers.
Opting for differentiating virtual hard disks saves around 90% of storage space consumed by OS images. Further, iSCSI target servers provide constantly available block storage for server applications.
And, if you are looking to optimize sharable server storage, Heterogeneous storage iSCSI target server is your ideal choice, as it allows interaction with even non-Microsoft iSCSI initiators.


Leave a Reply
Want to join the discussion?Feel free to contribute!