Download “NTFS #3 – Share Permissions” as an eBook
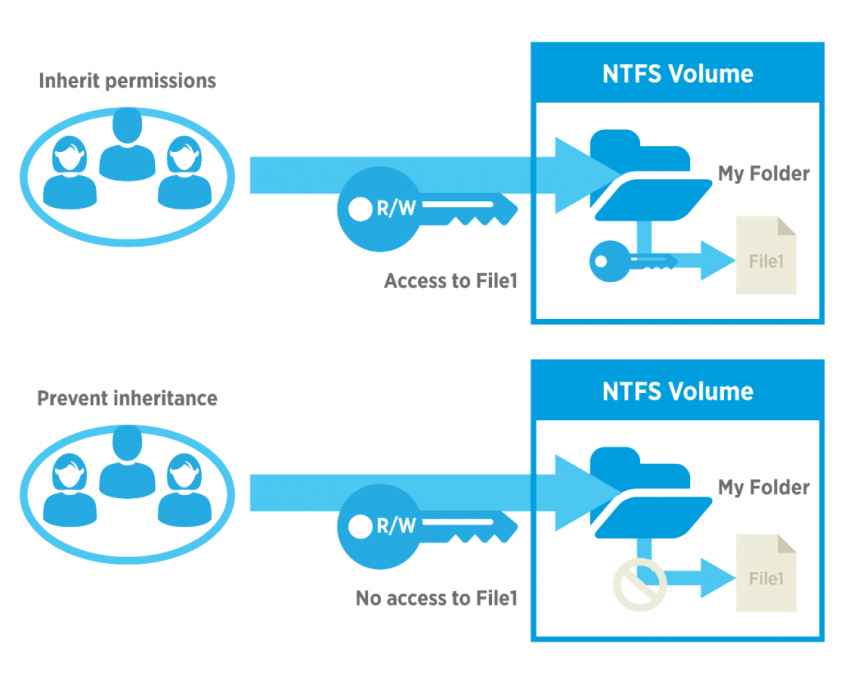
Understanding Share Permissions
Shared folders are used to provide other users, on your Windows network, access to the contents of those folders. You can only share folders, not individual files.
Share permissions are only applied when a shared folder is accessed over the network. It is a common misconception to think the process works in a different way. When you log into a Windows machine locally (even if a file or folder is shared to other users within the network), every time you access an object, NTFS permissions apply and not share permissions. It does not matter how restrictive share permissions have been set up, if you have access to the object and you are logged into the workstation or server that “owns” the file or folder, you will be granted access.
There are three types of share permissions:
- Full Control: Allows the user to read/execute/write/delete the contents of the folder and manage the folder permissions.
- Change: Allows the user to read/execute/write/delete the contents of the folder, but does not allow the user to modify its permissions.
- Read: Allows the user to read the contents of the folder and its files.
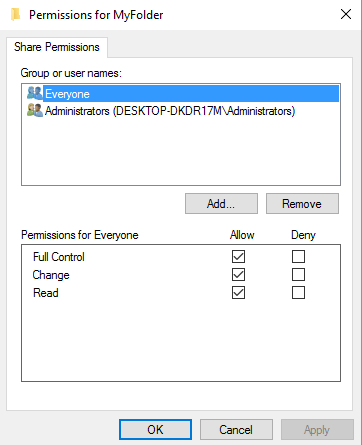
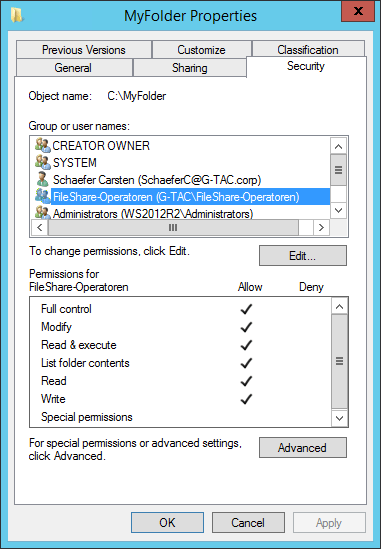
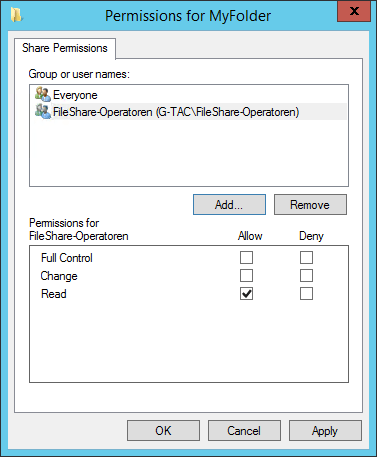
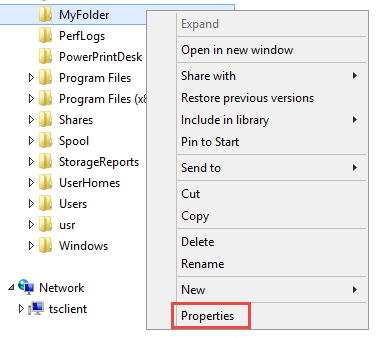
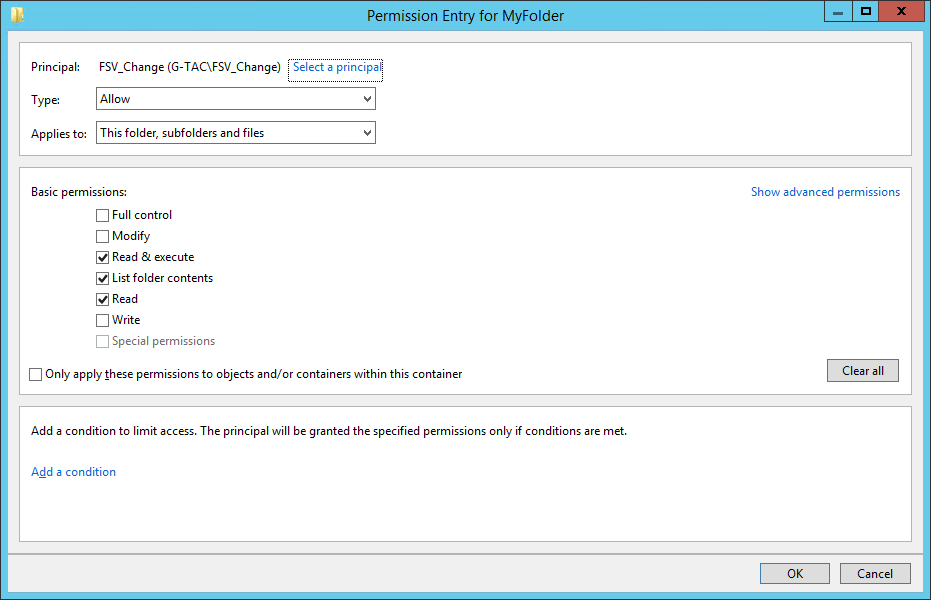
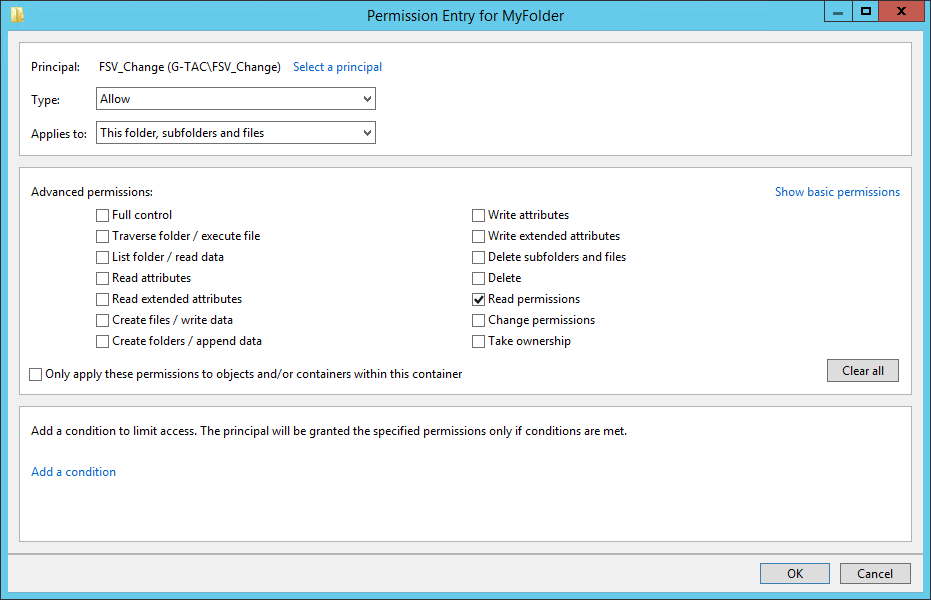
Share Permissions for MyFolder
How to Share Folders
Although the concept behind sharing folders has not changed, there are now two ways to share folders after the release of Windows Server 2012. In previous versions of Windows, the process was isolated and you had to access the folder first or login to the server that owned the folder in order to share it. Windows Server 2012 provided a new interface and a more centralized way of achieving this goal by using the Server Manager. This section will cover both options.
Sharing Folders – The Traditional Way
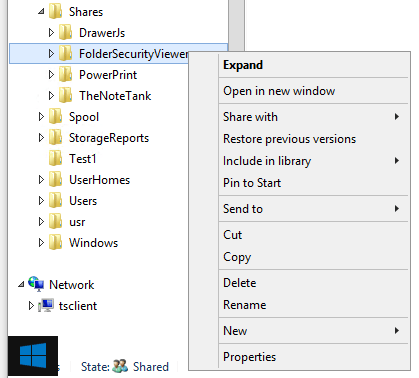
Right click the folder. Then click on Share with followed by Specific people.
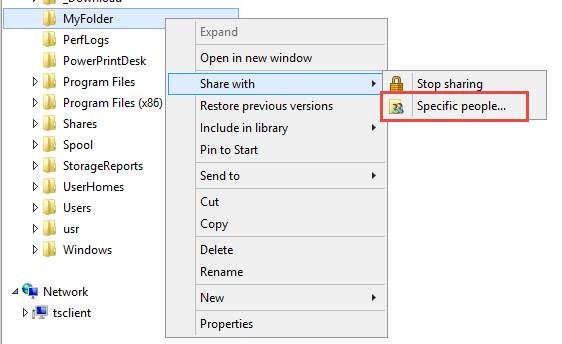
“Share with” Windows Menu
Next, you will be presented with the following form, in which you select which users will be granted permission to access the folder. Click on the arrow, followed by Find people.
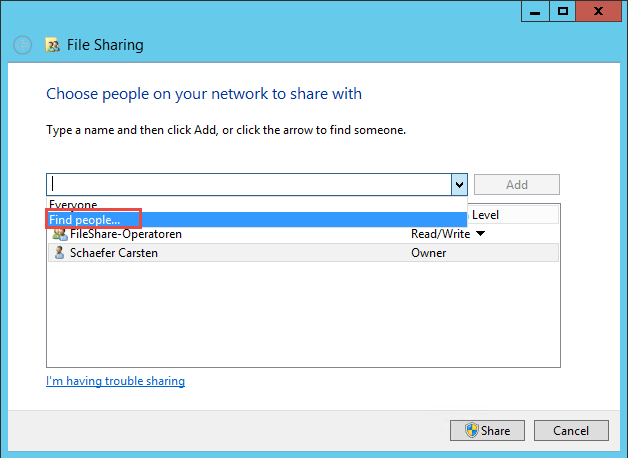
File Sharing Properties Page
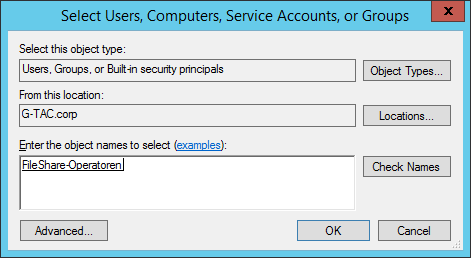
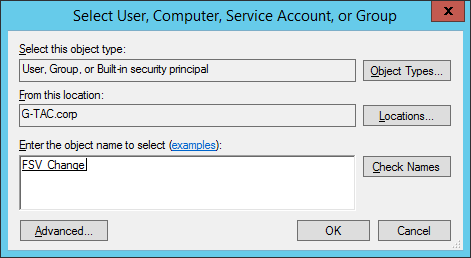
Now you can select the users who will have access to the folder. Type their name and click on the Check Names button. Once you are done adding users, press the OK button. For this example, we will use the group “Everyone”.

Select users or groups
Click on the Share button.
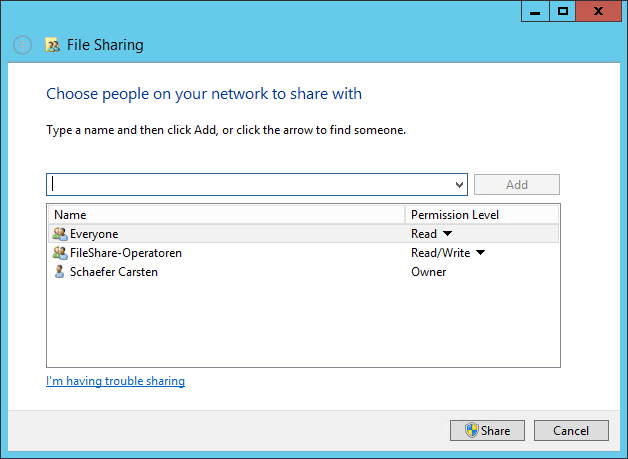
File Sharing Properties Page
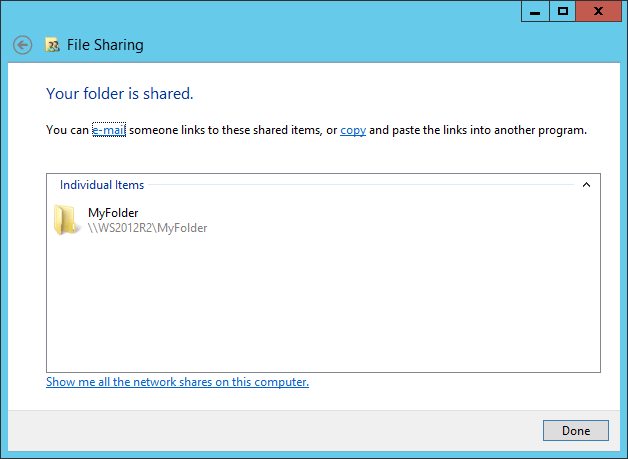
Your folder is now shared to the users/groups that you chose during the previous steps. You can email the link to this folder to the respective users or copy and paste the link as you please.

Shared Folder Confirmation
This is the link we obtained for our example folder after clicking copy:
MyFolder (file://WS2012R2/MyFolder)
Sharing Folders – The Server Manager Way
The Server Manager, a graphical interface that integrated many tasks initially done in separate and unorganized ways, was first introduced as a concept in Windows Server 2008. However, it wasn’t until the release of Windows Server 2012 that this concept was fully implemented and improved. Now, the Server Manager is frequently the starting point for any task that needs to be performed on the server.
Sharing folders are now fully integrated into the Server Manager, which provides a more centralized means of sharing folders among different users and from different servers, although the concept remains the same.
First, open the Server Manager. On the lefthand side, you will see all the roles your server provides. Click on File and Storage services. (Note: you need to have previously installed this role using the “Add roles or features” assistant.)
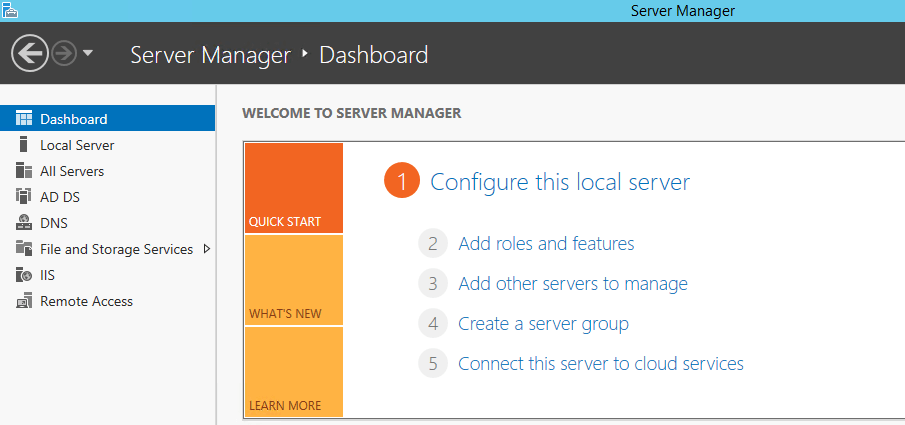
Server Manager
Then click on Shares, followed by Tasks, followed by New Share.
New Share Option in the File and Storage Services Manager
Now you will choose what you want to share. Each option has a description on the righthand side. For the purpose of this article, choose SMB Share – Quick and click Nextbutton.
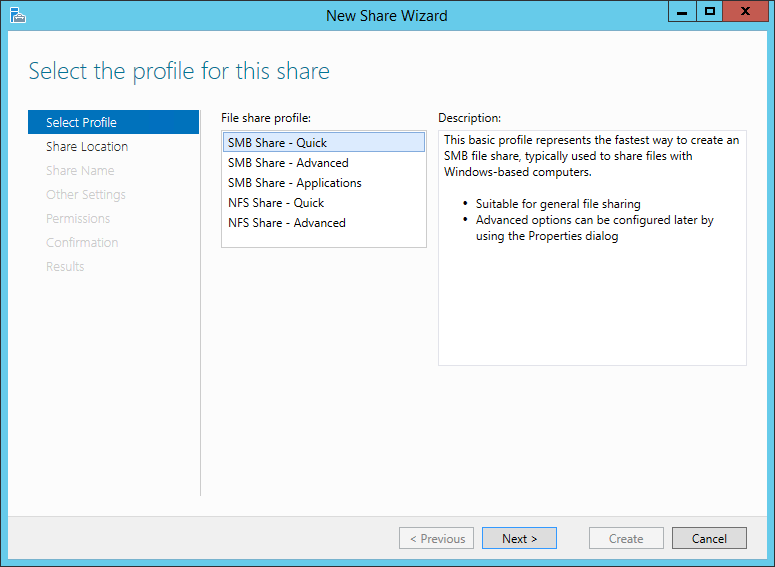
New Share Wizard
Now select the volume and/or the path for the folder that you want to share and click the Next button.
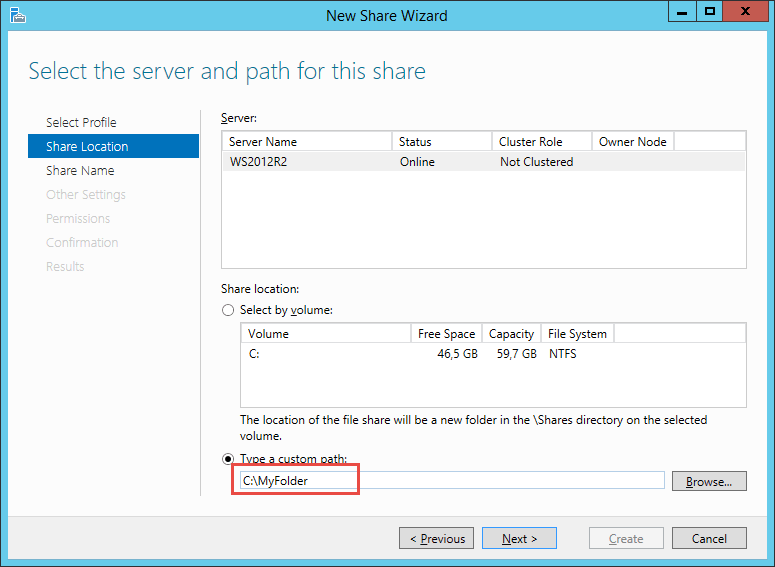
Selecting Server and Path
Type a name for your shared folder. By default, the share name is the name of the actual folder, but you can choose any name that fits your purposes. Click the Next button.
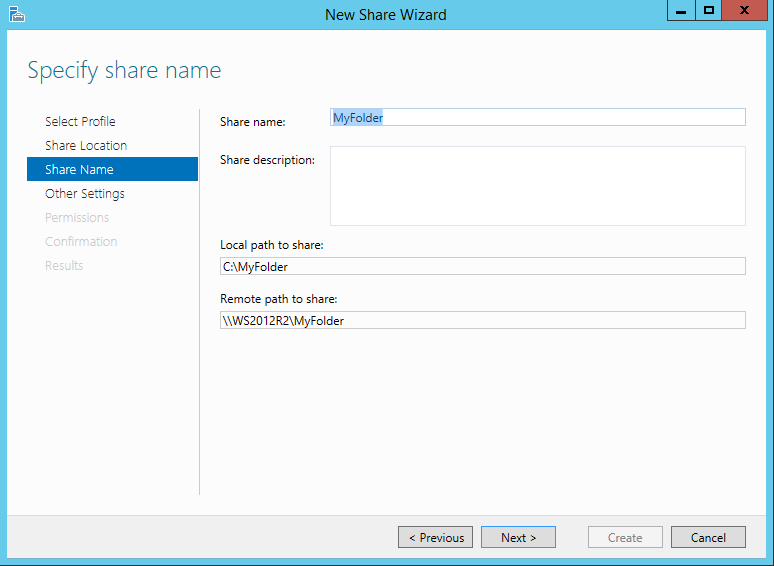
Specify Share Name
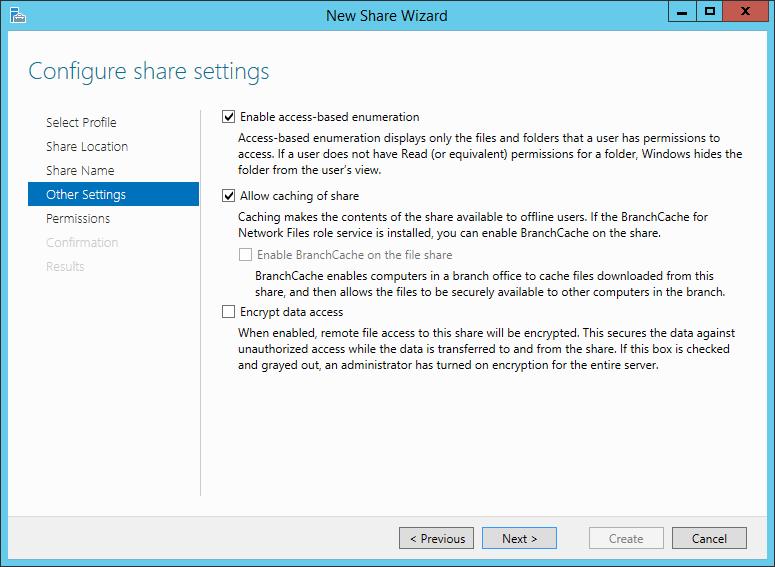
You are now presented with the Other settings form. Here you can choose some new features to use with your share that were not present in previous Windows Server versions (or that were only available by downloading separate Windows Server packages). The form contains a brief description of each setting, which will be summarized below to provide better understanding. Keep in mind that these options were made to improve security and reliability, thus it is best to choose all of them as we have done in our example.
- Enable Access-based Enumeration: Use this setting when you want to prevent users from seeing other folders besides those they have access to. For example, if you create a folder that contains all “Home” directories containing their personal files for several users, you might want to allow each user to only see the list of folders within their own folder.
- Allow Caching of Shares: Use this setting to provide users with an offline copy of their folder. This is particularly helpful if you run into network issues that prevent users from accessing the network path for their folder.
- Encrypt Data Access: This setting improves the security of your network shares by encrypting all data in transit. In the case that it is intercepted while being transferred to or from the user workstation to the shared folder, the content will be encrypted and become inaccessible to other sources.
Once you are done selecting these options, click the Next button.
Share Settings
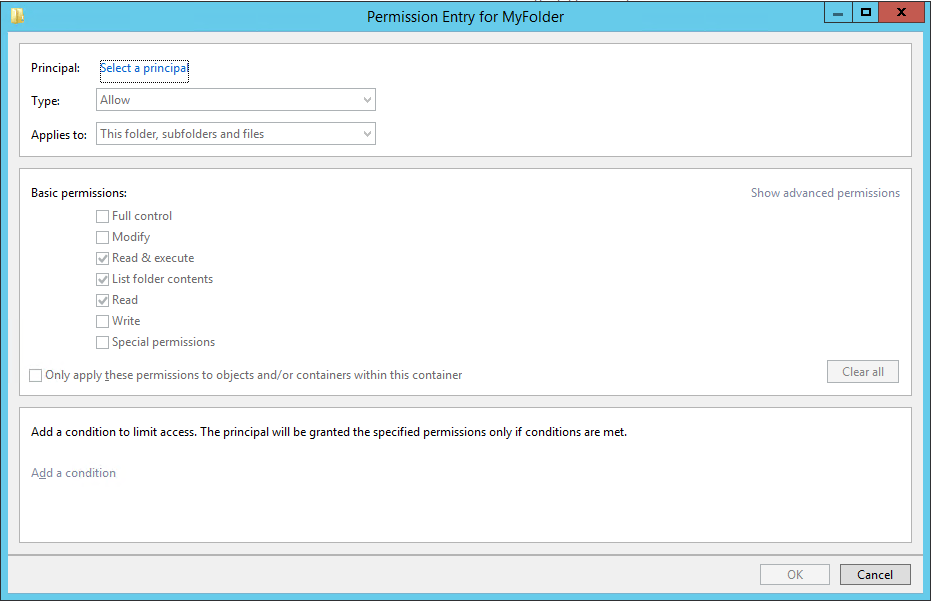
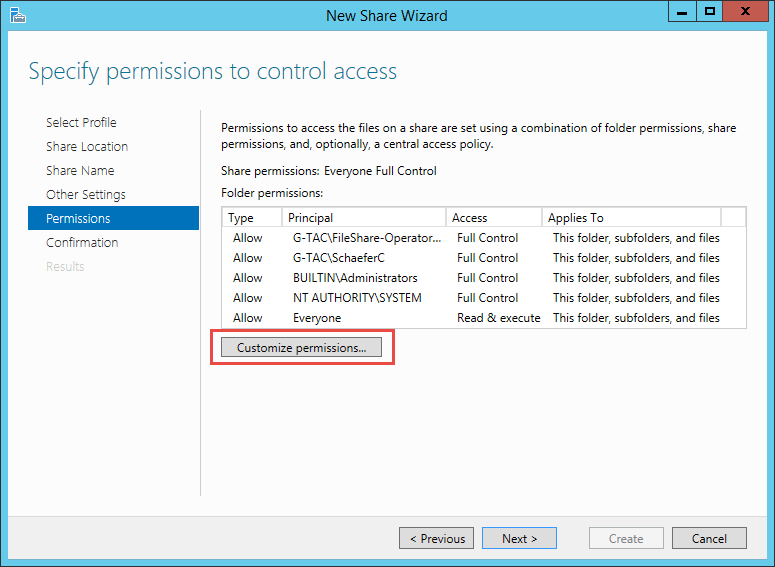
The next step is to configure permissions. This step centralizes the setup for both NTFS and share permissions to a single screen.
Remember that, by default, your folder is shared to the group “Everyone” with “Full Control”. This is shown in the tab “Share permissions: Everyone Full Control”.
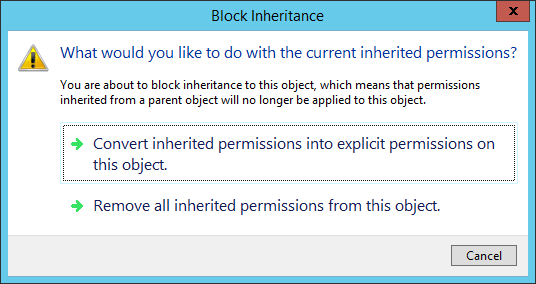
Next, you can see a list of the current NTFS permissions for the folder. Remember that, by default, the folder will inherit permissions from its parent folder.
To change these settings, click the Customize permissions button.
Setting Share Permissions
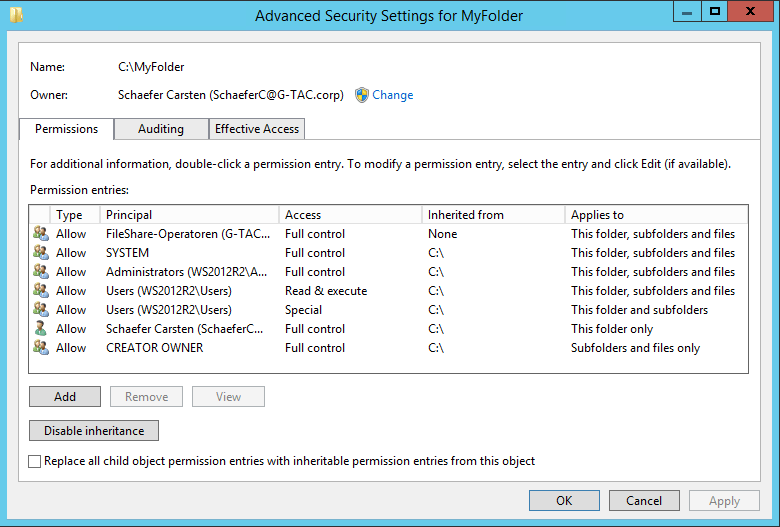
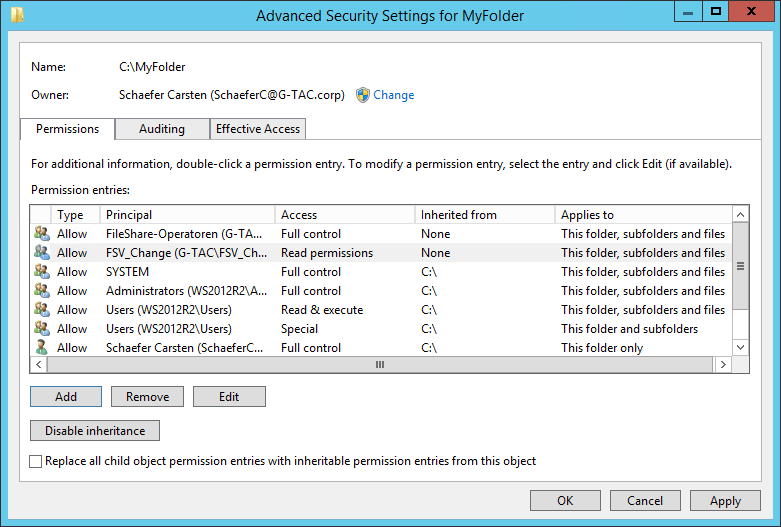
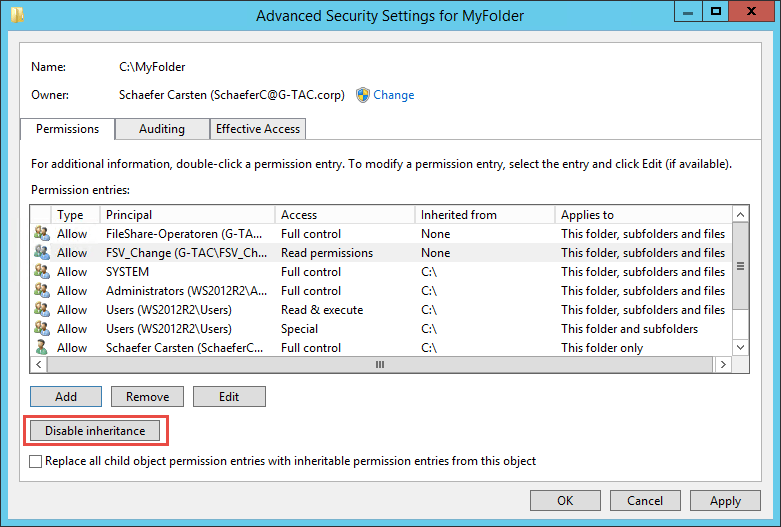
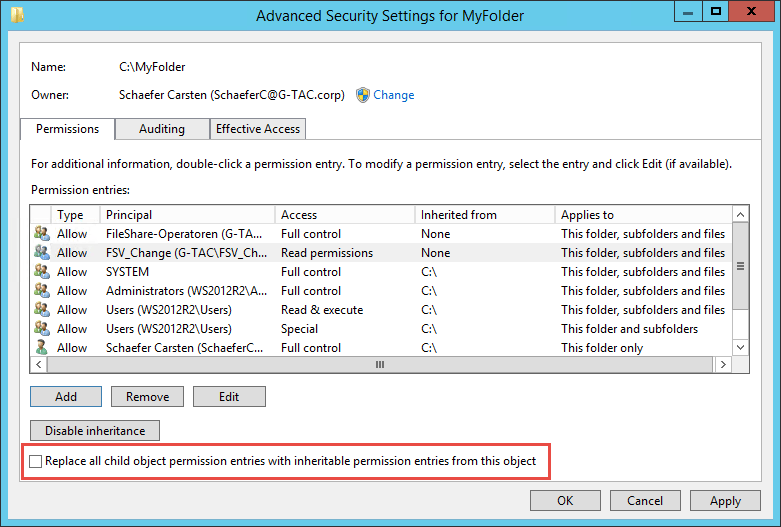
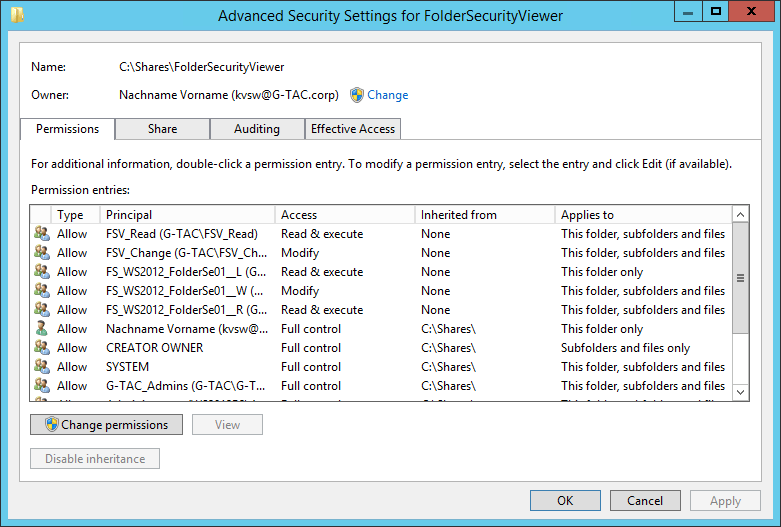
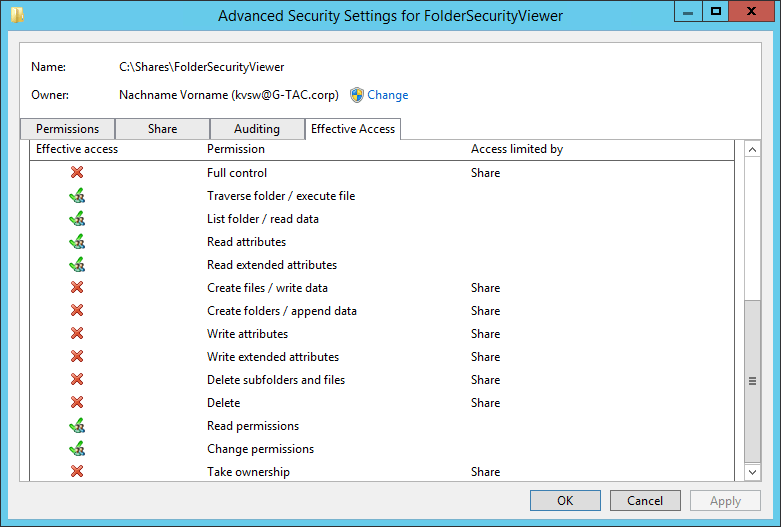
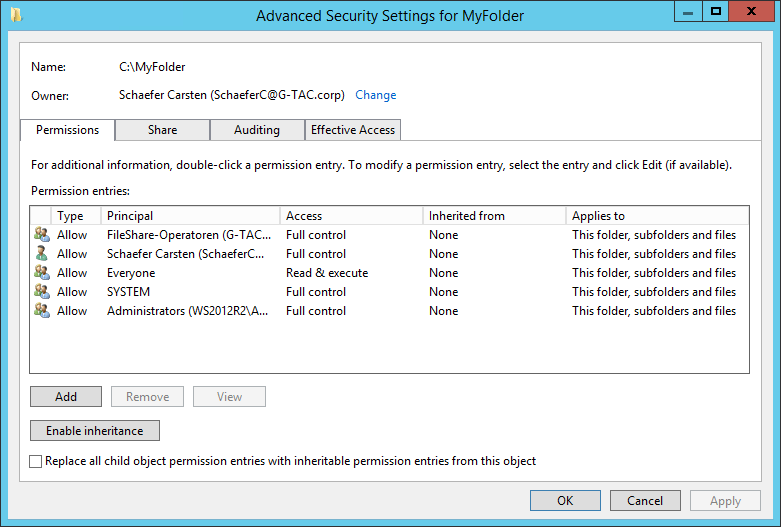
Notice this is the same Advanced Security Settings properties page that we saw in previous chapters under theShare tab, where you can set share permissions for users or groups, thus combining NTFS and share permissions in a single graphical user interface. Once you are ready to set up your permissions, click the OK button followed by the Next button.
Advanced Security Settings Properties Page
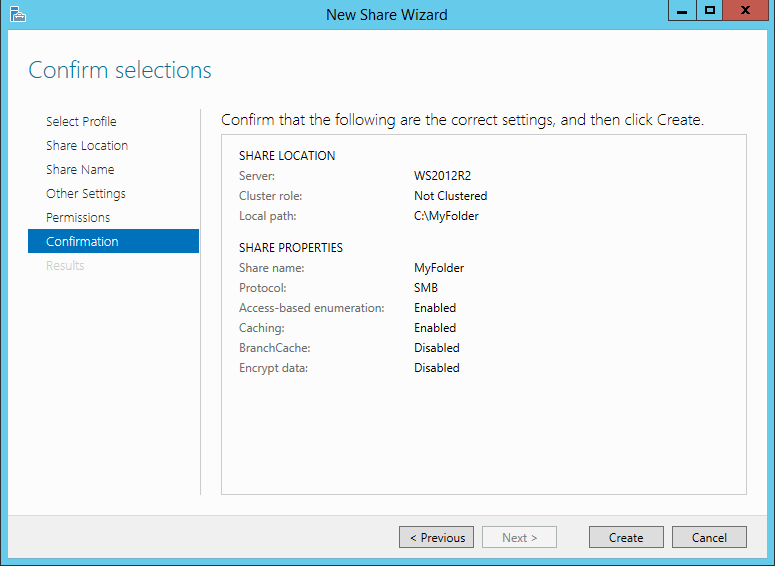
Finally, you are provided with a summary of the share you just set up. To finish the process, click the Create button.
Create Share Confirmation Page
How to List Shares
In previous editions of Windows (both for Servers and Workstations), once you shared a folder, a hand would be displayed next to that folder’s icon.
This changed in Windows Server 2012 for Windows 8 and Windows 10.
For workstations, there is now only one way to list your shared folders. For servers, there are two different options.
- For workstations/servers: Go to
Windows File Explorer. Click on Network followed by the name of your server/workstation to display all shared folders.
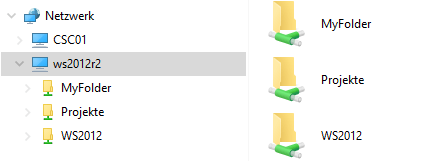
List of Shares in Windows Explorer
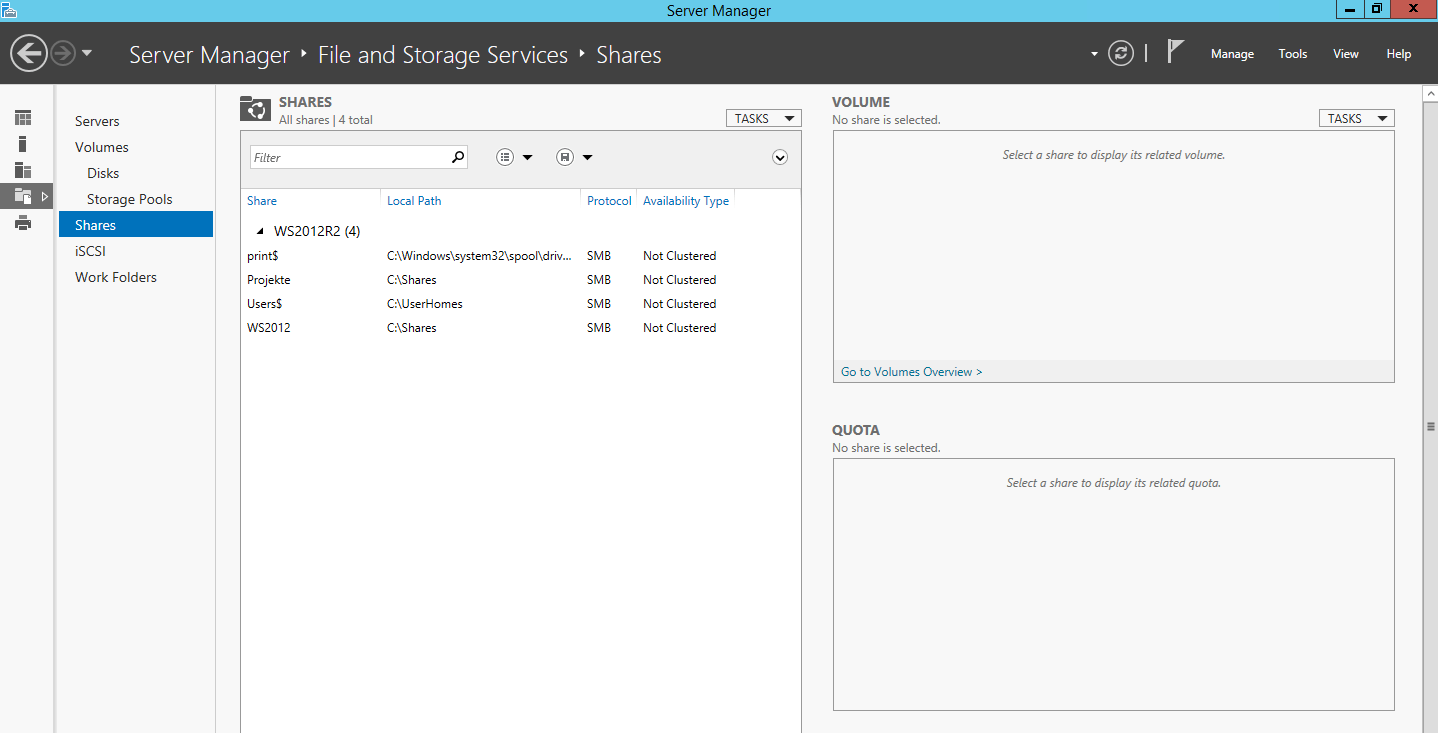
- For servers: Go to the Server Manager. Click
File and Storage Services followed by Shares to list all shared folders.

List of Shares in Server Manager
Download “NTFS #3 – Share Permissions” as an eBook
Get your free edition of the easiest and fastest NTFS Permission Reporter now!